Taking pictures of pets can be challenging but it can also be a whole lot of fun. The first bit of good news is that when photographing people sometimes you need to tell them "just be yourself." When photographing pets, they're always being themselves and don't give a hoot about the camera.
One useful guideline is the same as when photographing children. That is that it's usually very effective to get down on their level. It personalizes them and puts the viewer in their world. As you can see in this picture of my cat Bart. Down on his level, you can capture what he's doing.
It also pays to get up close and personal. How can you resist this cute teddy bear face?
Of course, rules are meant to be broken from time to time. Sometimes a picture shot from on high seems appropriate. Particularly since this is usually the angle from which pets and their people look at each other. Or a certain setting calls for this approach. For example my other cat Lisa (yes, they are brother and sister) loves to play with my shoes. She wrestles with them, chews on them and generally has a good time and makes a mess. So I like to call this picture "Shoes? What shoes?"
It's also helpful to know a little about the behavior of the pet. For example a friend of mine was telling about when her dog is tired from playing ball, she'll lay down and rest the ball on top of her paws. I thought "That is so cool. I'll have to get a picture of that." And so I did.
Dedicated photographer out for hire to shoot weddings, head shots, and special events. Contact me at Paul@BudgePhotography.com.
Monday, December 27, 2010
Saturday, December 11, 2010
Dragging The Shutter
You know how when you use a flash on your camera how the background always turns fades out and turns black? That's one of the things that I dislike about using a flash. More often than not I prefer to shoot in natural light. However, there is a trick that you can use fix this problem and it's called dragging the shutter.
After setting up your camera to use the flash, you then switch it to manual mode and reduce the shutter speed. It may take a little experimenting so you might start at 1/15th of a second and then work up from there. The result is that the flash illuminates your subject but then the shutter stays open after the flash has fired, thus giving your sensor the chance to capture light from the background as well.
In this instance I was breaking in my new remote wire for my flash so that I could use the flash gun from the side. That creates some pretty dramatic shadows.Of course, slowing down the shutter opens up a whole new world of possibilities that I will explore in the future. This next picture takes a step in that direction. Here right after the flash fired, I stepped out of the picture while the shutter was still open. As a result, I'm all there during the flash but you can also see the background through my sweater. The wavy light that seems to be flowing from my lens was just a happy accident. Something you look to create when playing around with the slow shutter speeds.
Saturday, December 4, 2010
Some Snowy HDR
We recently had a fantastic snow storm that dumped a bit more snow than we are used to around here. So naturally that was the perfect time take some pictures and play around with the HDR. One of the things that makes it challenging is all that white. It doesn't give you a lot of color to play with but at least it gives you a chance to make less strange looking pictures in HDR. Here in the patio picture, it looks fairly normal but was able to use HDR to bring in more of the details in the background and behind the chairs. I was also able to bring out more of the texture in the snow.Then for another picture of my back gate, I used the glow setting to really bring out some interesting highlights in the snow on the ground. After I made these adjustments, the picture struck me as being just a little bit creepy. Fun effect.
Sunday, November 28, 2010
A Slightly Lighter Touch in HDR
I'm still playing with HDR, just to see what I can do with it and to improve my skills. Here I'm trying to bring a little life into a picture that started out pretty flat. The first picture was taken on a very drab and cloudy day. The light and the setting resulted in some really subdued the colors. So I took a series of pictures of this setting at various exposures and then loaded them into Photoshop's HDR merger. There I brought up the colors using the saturation and vibrance controls. Then with the HDR strength control I tried to add a little more drama to the sky. I think it made the picture look a little more interesting. Also, since this picture was taken through a window, I had to use Photoshop to remove the reflections of the indoor lights in the glass.
Saturday, November 20, 2010
Panorama in Photoshop
Once again I'm playing around with some of the fun things I can do with Photoshop and my camera. This time I'm using the photomerge command. First of all, I had to take a series of pictures while panning my camera across the scene. One thing I had to do was to fix the focus and switch it to manual to make sure it didn't change as I moved the camera. To keep the camera level and the pictures all on the same plane, I mounted my camera on the tripod and then panned from left to right, taking shot after shot attempting to include about 40% of the previous shot in the next frame. That gave me a series of pictures to feed into photoshop.In photoshop, I selected the photomerge command and then selected the series of pictures that I wanted to use. I also tweaked the format a bit, the cylindrical layout mode since this was a really wide panorama just to keep the distortion down to a reasonable level. It looks like I may have missed the 40% as I approached the middle but on the other hand I'm glad that the posters hanging on the wall in the background didn't get blocked. I call this picture "Minions Coming and Going." This is another fun technique that I plan to work with more and see what cool things I can create with it.
Saturday, November 13, 2010
Another Great Family Portrait Shoot
This time around we did the family portrait shoot in my studio. The place really isn't that large and is probably better suited to taking pictures of objects and individuals but we managed to make it work. On the plus side, it's a very controlled environment and we don't have to worry about things like wind messing up people's hair or unexpected interruptions.They were a fun bunch to work with and so we experimented with a number of different poses. I had a few suggested ideas for posing and they came in with a number of things they wanted to try.
With some very cool results.
And the fact that these people are involved in the local theater and music scene helped to fuel our creativity and gave us more ideas.
Such as this Gladys Knight and the Pips inspired pose. Don't you love it when a photo shoot is this much fun?
With some very cool results.
And the fact that these people are involved in the local theater and music scene helped to fuel our creativity and gave us more ideas.
Such as this Gladys Knight and the Pips inspired pose. Don't you love it when a photo shoot is this much fun?
Tuesday, November 2, 2010
Phil's Dragon
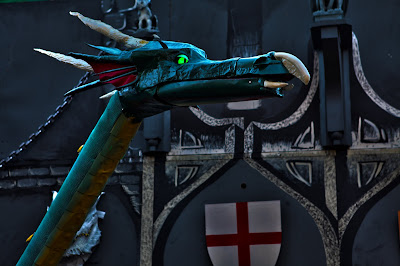
Halloween is my friend Phil's favorite holiday, as you can tell. He dresses up as a fancy vampire with a costume that not only includes fangs but red contact lenses as well. But that's only the beginning. The big project that he spends all of October preparing for is converting his front yard into a dragon's castle that includes treasure, witches, a slain knight, the dragons hoard, damsels in distress chained to large rocks and an animatronic mechanical dragon that even breaths fire. It's a very popular stop for trick or treaters of all ages.
This event becomes a fun time for Phil's family and a number of his friends.
I decided to do an HDR image of the dragon. Instead of going for something extreme or surreal, I decided to play with the lighting and go for a more subtle effect. The result looks more like the lighting you would see in a movie.
Monday, October 18, 2010
Great Wedding Shoot
This weekend I had a fun wedding photo shoot. The tricky part is that we closed on the deal via email and had never met the bride or anyone else involved. There was also a long negotiation process. Just another sign of the tight economy these days. Still, it's better to have discounted business than no business at all.
In any case, I was the first person in The Eyrie at Kathryne Albertson park and it was easy for them to identify me as the photographer with my huge camera and over the shoulders camera harness. Also I had chosen to dress professionally, all in black.
In any case, it was a fun gig, they were great people and I had a wonderful time working with them. I also didn't hesitate to hand out my business cards. That's particularly nice since I think I left them with a positive impression.
Now I have 482 images to sort and process. A lot of the main pictures are multiples of the same pose so the final package will be a lot less when I deliver it. I've learned over the years that when you take pictures of a group of people, someone's going to blink when you hit the shutter. So it pays to take lots of shots to have choices to make. The joys of the digital age. :)
Saturday, October 9, 2010
Playing with HDR
I've learned a trick using my camera and Photoshop. It's called HDR which is short for High Dynamic Range imaging. Using this trick you can combine a variety of color ranges and exposures into one image with some very dramatic results. I'm just starting out so I'm going to have fun playing with the potential of this process.
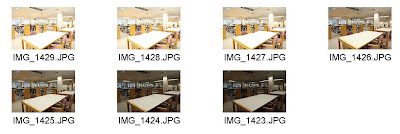
The first thing I did was to set my camera up on a tripod and shoot the same picture over and over again but changing the exposure with each shot. These shots ranged from under exposed to over exposed and here's the result.
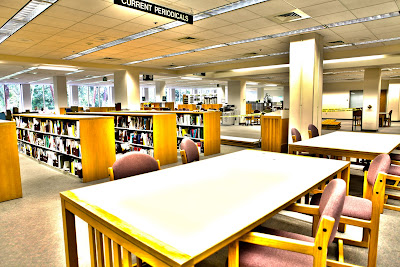
Then I used the HDR merger to load them into Photoshop. This opens a series of slider tools that you can use to manipulate the pictures as they are stacked on top of each other. You can bring out the best parts of each exposure, including details that couldn't be seen in some of the shots. There's also a lot of other fun things that you can do to make the photo look surreal and fantastic. This is what I came up with at one point.
Some may consider this bad HDR or even HDR abuse, making weird looking pictures. That's because one of the interesting powers of HDR is that you can also make very realistic pictures. The trick is that you can create pictures that appear as the human eye views a scene in detail that the camera cannot. Cameras only pick up details at a certain exposure while people can see into shadows on a bright day.
In any case, this is a fun new toy that I plan on having lots of fun with.
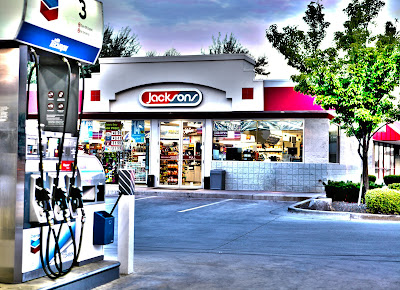
Since I had a lot of exposures from my Jacksons Foodstores project, I decided to do an HDR of that too.
Saturday, October 2, 2010
Family Portrait Session
A few months ago I did a really fun family portrait shoot. We all met up at Katheryn Albertson Park which is a beautiful place for such a taking pictures. It has rich greenery, winding paths and ponds filled with fish and water fowl. It's also a popular place for wedding ceremonies. There are literally hundreds of fun spots to explore. And aside from all the great vistas, the numerous trees also provide the right kind of diffuse lighting for some really great close up shots.
The other challenge is photographing toddlers. In my experience, the best approach is to put them down and just let them do their thing. Trying to get them to pose at best bores them and at worst they get annoyed after a while. However, if you let just them be themselves, then the child is happy and you get some great pictures that help the family remember what they were like at this age.
It's a lot of fun working with the customer to see what kinds of pictures they are looking for and encouraging them to experiment to what surprises may come up. If things go really well, they'll even want a picture with the photographer. :)
Saturday, September 18, 2010
This summer we had our 30th high school reunion and I was asked if I could be the official photographer for the event. A great idea, since I always like to be accomplishing something this gave a focus to have fun with. Not to mention a great excuse to point my camera at any and everybody.
My plan was to upload the pictures from the reunion to a Flickr account and that we everyone else could download pictures from the event to their heart's content. However, before that, I wanted to create an establishing picture to act as a place marker in the Flickr album. After thinking about it a bit, since I still had all my old high school year books, I thought they would do the job.
Normally I'd do a shot like this in my studio but one of my first thoughts was that really liked the idea of having bookshelves in the background and having them lay on a wooden surface. So I did the set up in my office. Though after experimenting with composing the shot I scratched the background idea. Then I worked on lighting the set up. So it all looked like this.
I cut a hole in a sheet of construction paper to tighten the focus of my light and then used my wireless remote control to fire the camera so that it would stay steady in the low light and I wouldn't mess up my composition by touching the camera. Here's the final picture.
Tuesday, August 31, 2010
New Business Card
After showing my old business card to a business adviser, I finally decided that it was time to create a new one. In the past, I had emphasized bargain rates but suggested that I aim higher in the market and find a way to get my work to speak for me at the same time. So selected a picture from a family portrait shoot that I did a few months ago and then broadened my business model. I think the results are pretty good.
At least I'm getting a lot of "Oooh!" and "Ahhhh! when I show people my card.
Saturday, August 28, 2010
Been busy but not writing
I've been doing so many things here lately that I haven't been keeping up with the blog. I've done a number of commercial shoots, portraits and lots of fun experiments. So I'm going to try to gradually catch up.
One of the most recent things I did was a sunrise shoot for Jacksons Foodstores. They wanted a sunrise shot of one of their stores that faces east. Also, they were looking for an golden hour effect so that the light inside the store is balanced with the light outside. That way you can see what's going on inside while viewing the outside as well. This involved me arriving at the store before sunrise and working out details with the store manager before setting up the shoot.
Then I set up my tripod, mounted the camera and set it to receive signals from my remote control. That way I could fire off pictures without worrying about camera vibrations since I didn't have to touch the camera.
In the end, I spent about and hour there and took 125 pictures as the sun slowly came up. I had a pretty wide window of opportunity to get the shots since we had cloud cover in the eastern sky.
Then back home I selected three different shots that pretty much covered all the possible light levels and sent them to the client. She selected the earliest shot but also requested that I remove the hose cart that sat below the store window. So I spent some time in Photoshop brushing it out and then re-texturing the wall behind it and drawing in the mortar lines. In the end, the customer was pretty happy.
Subscribe to:
Posts (Atom)